Ryan O'Rourke, Anna Gurevich, Jon Pedersen
Stanford University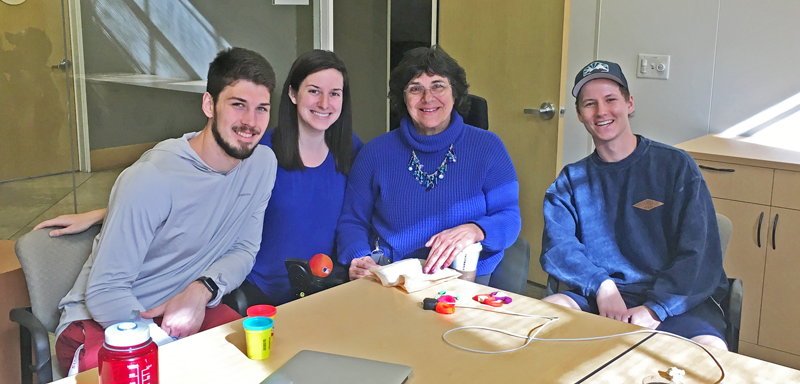
Introduction
Many medical conditions result in loss of grip strength – from carpal tunnel syndrome and quadriplegia, to simply the effects of aging. To combat lowered grip strength, companies have designed sets of products that facilitate the handling of many items ranging from utensils to writing materials, and many more. [1, 2] However, few products address the difficulties of handling plugs, and so as a result, people have to come up with creative ways of maneuvering plugs themselves.
To understand more about the specific need of gripping aids for plugs, our team worked closely with Molly Hale, our project suggestor. In 1995, Molly was involved in an automotive accident that resulted in a serious spinal cord injury, limiting her movements through the onset of quadriplegia. Through dedicated rehabilitation, she has regained much functionality throughout her body, and enjoys living an active lifestyle, pursuing activities like horseback riding, swimming, and the martial art of Aikido. [3]
Although she has continued to recover since the accident, Molly still faces limited grip and hand/arm function. She uses many forms of assistive technology, including a highly functional wheelchair, to aid in everyday activities, but one thing that proves to be difficult for her is plugging and unplugging cords from outlets. Over the last twenty years, she estimates she has spent about 1,520 hours trying to maneuver plugs – most commonly, her iPhone charger, wheelchair chargers, and standard three-pronged wall outlet plugs. [4] She has found the highest level of difficulty to be in holding the plugs, having enough gripping force to put them into and out of their outlets, and knowing how to orient the directional cables. Molly’s request for our team was to create an aftermarket part to attach to a variety plugs, to allow her to spend less time working with plugs and to give her more time to focus on the many outdoor activities she enjoys.
Objectives
After learning more about Molly’s condition first through watching her documentary, “Moment by Moment: The Healing Journey of Molly Hale,” and through preliminary email exchanges, we centered our ideas on a few main objectives: First, we wanted to create an aftermarket part to avoid forcing her to rewire all the plugs in her house. Second, we wanted to make sure that the product would aid in both plugging in and unplugging of cords, specifically for Molly’s lowered grip strength. Finally, since any user would likely need more than one of these products for their multiple cords at home, we wanted to be sure that our product was low-cost.
Ultimately, our main goal was to create a product to suit Molly’s specific needs as outlined above. We wanted to make a design that is flexible and universal enough to help many people with grip impairments, but we wanted to center ourselves to first and foremost be sure to meet Molly’s requests.
Design Criteria
Our background research began after deciding on our project goals and confirming our project with Molly. Our team came to our first meeting with a basic understanding of what we thought our main design criteria would be and with research of some devices that had previously been designed for the same purpose.
During our first meeting with Molly, we discussed ideas that were currently on the market or in the public domain. However, after discussion with Molly we realized all designs exhibited major design flaws for her intended use. As shown in Figure 2, one website, Essential Aids UK, offers a couple specialized plug aids for grip impairments. [5, 6] However, these options do not work for Molly, because both only work on wall outlets. Additionally, Molly explained that people living with quadriplegia would struggle to fit their entire hands through a loop as shown in the first product of Figure 2, and the second product would not work as it only would assist in unplugging – not in plugging cords in. Finally, this website does not even ship products to the United States – entirely removing them as options for Molly.
Since there were not products available in the United States for sale, we then looked into projects that other people had put into the public domain. As depicted in Figure 3, what we found still did not meet our objectives: The projects required rewiring existing plugs and outlets, and typically they did not aid enough in gripping capabilities – just like the Essential Aids options, they tended to only help with the unplugging action. [7, 8]
So, after examining these products’ drawbacks with Molly, we brainstormed four basic designs to consider: the universal method, specific method, magnetic method, and tool method. The universal method would be a cheap attachment that could assist Molly in any situation in which she would need to use a plug – a single attachment that would work for an iPhone charger, wheelchair charger, and home appliance. The specific method also involved developing a cheap attachment, but it would be manufactured for each individual type of plug – for instance, one attachment for Molly’s iPhone, a separate one for her wheelchair, and a third one for a home appliance. The universal method would be simpler to manufacture and develop, but will likely have limitations with certain types of plugs as it has to be designed to work on numerous shapes of plugs. The magnetic method involved rewiring outlets and adding magnetic attachments to all cords so that the user could simply hover the magnetized end of a cord to its mating outlet, without worrying about directionality or strong grip. Although expensive and complex, this was something our team wanted to explore because of its extreme functionality. The final method considered – dubbed the tool method – involved building a tool resembling pliers to aid Molly in connecting the male and female ends of any type of plug.
|
Design Method |
Functionality (x6) |
Sleek Design (x5) |
Cost (x4) |
Comfort (x3) |
Attachment Ease (x2) |
Coolness Factor ( x1) |
Results |
|---|---|---|---|---|---|---|---|
| Universal | 4 | 5 | 5 | 4 | 3 | 3 | 90 |
| Specific | 5 | 5 | 5 | 4 | 3 | 3 | 96 |
| Magnetic | 5 | 3 | 1 | 4 | 1 | 5 | 68 |
| Tool | 3 | 2 | 2 | 3 | 5 | 3 | 61 |
To help our team better understand the inherent strengths and weaknesses in our design approaches, we developed a list of our design criteria, weighted the criteria based on their importance, and assigned ratings to each design approach based on its ability to comply with the criteria. We prioritized functionality of design most heavily because the main goal of the project was to help Molly operate more efficiently in what should be a simple task. The sleek design aspect was essential to the final product because Molly needs to be able to use her devices even while they are charging or plugged in. For example, if our product attached to a USB cord, Molly still would need access to the other ports on her computer, and so a bulky attachment would obstruct the pathways to other ports. Our team needed to keep costs down so that manufacturing a significant number of the attachments would not be too costly to our team or to Molly. Both comfort and ease of attachment of the particular device were ranked low as the device would be used intermittently and attaching the device could be done a single time and remain on the plug for an extremely long period of time. The “coolness factor” of the plug was ranked the lowest because the notion of making a plug “cool” seemed insignificant to our group and Molly. When creating a Pugh chart to aid our decisions, we weighted each category in the order described above, ranging from the most important quality, functionality, earning a weight of 6, down to the least important factor, “coolness”, earning a weight of 1. Below is the chart that came from this reasoning:
Methods
Having gone through these brainstorming exercises, our team decided to ideate, prototype and design an attachment using both the specific and universal methodology. We thought that the universal attachment could be applied to many different types of plugs, while ones that needed more exact attachments could be dealt with using a uniquely designed specific attachment. Our team worked closely with Molly throughout the entire design process to ensure that we develop a product that not only meets our design specifications, but also works precisely the way Molly needs it to.
Initial Steps: Sketches and Product Offerings
We started by sketching some ideas based on current product offerings, each time trying to improve what we found on the market. During our first meeting with Molly, we shared the products we had found online, along with our preliminary sketches of products. Through this meeting, we were able to discuss what she thought of our sketches and learned that an attachment with a rounded handle would be the best option.
Play-Doh and CAD Models
We took Molly’s suggestions from our first meeting and continued to iterate. For our next meeting with her, we purchased Play-Doh so that we could model more tangible products at a low cost and effort level. This helped us iterate through designs quickly and was an important step in our design process. We also came prepared with SolidWorks models, so that we could show her a more refined idea of our current visions for prototypes.
Our SolidWorks models demonstrated our first attempts at both a universal and a specific design. Our universal product was designed to be tied to the top of any plug, with two holes for fingers and a stock to assist with pushing. Our specific product was designed uniquely for the iPhone lightning charging cable. It had two finger holes, just like the universal product, to facilitate grip, and it had a gap through its center to allow it to wrap around the iPhone charging cord. Figures 7 and 8 depict our initial CAD models for our universal and specific designs, respectively. During our meeting with Molly, we received comments that the finger holes were too restrictive in our models, and she suggested having a more open area for the fingers to slip through. She also recommended that we lengthen the stock of our universal design to best help her increase her force of pushing.
Refined Iterations: Specific Solution
We first iterated on our specific designs, and focused on an iPhone lightning cable and a USB cord – two cords that Molly uses the most often. Given Molly’s feedback on our earlier CAD designs, we decided to eliminate the two separate finger holes, and create a prototype that had a wider opening for her to fit as many fingers as she could comfortably maneuver. As depicted in Figure 9, we 3D-printed an elliptical shape large enough for Molly to fit between two and four fingers inside. When testing with Molly, she commented that she appreciated being able to wrap her fingers around the cord, and that the shape was ergonomically sound for her.
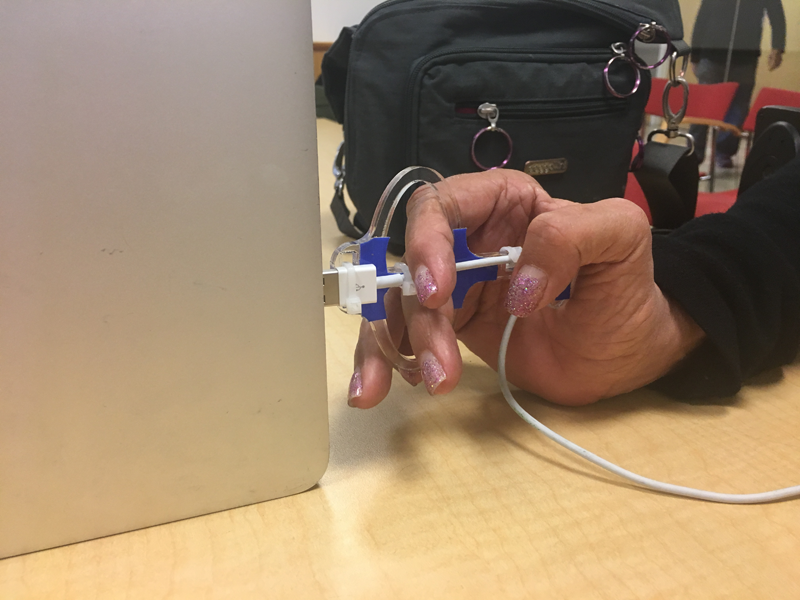
We also created a 3D-printed design specifically for a USB charger, as depicted in Figure 10. To provide variety for Molly, we wanted to test a different shape than the one we used for the lightning charger attachment. This USB attachment allowed Molly to fit one hand through the grip to guide the direction of the plug, and enabled her to use her second hand to provide the force to push the cord into a USB outlet. Molly commented that the prototype felt comfortable against her hand, but she did not think it was ideal to have a design that required two hands to use.
Refined Iterations: Universal Solution
We also iterated on our universal design based on Molly’s initial feedback. As shown in Figure 11, we made the finger holes larger and lengthened the stock that she would push with the palm of her hand. We also added more holes to attach Zip Ties to the cords, and included a notch in the pushing stock to allow the cord to press into it and limit wiggling. Under Molly’s guidance, we settled on using Zip Ties as attachments because they are easy to find, inexpensive, and they can withstand up to 120 pounds of force. [9] They also can be easily cut off if a user later desired to remove the product. To create this product, we simply laser cut acrylic before attaching it to various plugs to test. We found that the device worked well with most household plugs, but we saw three primary areas for improvement: First, the cords often slipped against the prototype’s surface, so we decided we would want to add a high-friction material to the acrylic. Second, we found that 0.125” acrylic was too thin and the prototype broke many times when we tested with it. Third, we wanted to modify the notch in the pushing stock so that it would better grab various sizes of cords. To accomplish the latter goal, we decided a tapered notch would work best to catch a cord, and so we brought this idea into our final design, explored in our Results section below.
Results
This design has many simple, yet effective features. First, the prototype can be Zip-Tied to many sizes of plugs through the four holes in the front and at the notch on the shaft towards the rear. Additionally, to keep the cord under control, the “shark tooth” notch at the rear of the shaft fits most commonly found household cords and keeps them out of the way of the user’s palm, as depicted in Figure 13. Molly said that this feature was necessary to keep any cord under control and to prevent it from getting in the way of her hand. As Figure 13 demonstrates, the tapered design of this notch allows for both thick cords – analogous to Molly’s wheelchair charger – and thin cords, like iPhone cords, to fit precisely into it.
Furthermore, the elliptical finger holes are small enough to allow for easy manipulation, yet still large enough to accommodate a range of hand stability – for instance, people who experience tremors in their hands can still find room to fit shaking fingers into the holes. The stock at the rear of the product provides a means to push without requiring any finger strength. It can be placed in the crotch of the hand, against the palm, or anywhere that an individual user finds comfortable. In Molly’s case, she most preferred having the stock rest between her thumb and index finger.
The final major feature, which was added last, is Dycem, a high-friction material commonly used to help people with grip impairments use materials on tables without them slipping out from under their hands. [10] For our use, we cut the Dycem to fit the shape of our universal design and saw that its friction prevented the cords from sliding along the product. Figure 14 depicts our design with Dycem attached.
The feedback on our design has been ecstatic. The most common response from the end-of-the-quarter trade show was “You should take it to market.” Even with this feedback in mind, we recalled that our primary user of interest was Molly, and importantly, Molly loved the product. We plan to send her about 20 copies and will collect more feedback to move forward with. So far, the ones we are testing are lasting without showing signs of wear.
The cost of each product is extremely low. With acrylic costing about $0.15 per unit, and Dycem costing about $0.35 per unit, our final product costs about $0.50. With such a low cost, we have succeeded in ensuring that the product could be feasible to users who need to outfit their entire houses with these products.
Discussion
The largest challenge we still face is ease of attachment. For Molly, this was not a concern, as she mentioned that her husband Jeramy could help her with the initial setup. That being said, we would like the attachment process to not include any finger-intensive processes such as using Zip Ties. If a person with arthritis who lives alone were to try setting our product up, they would face a challenge.
Additionally, we currently cut our Dycem by hand using an Exacto blade. Ideally, we would be able to use a machine to get the material to its correct size. We could likely laser cut the Dycem at the same time, if we could find a laser cutter with special ventilation for the fumes that burnt Dycem would emit. Another option would be to use a die cut press to avoid needing ventilation.
We are also thinking about changing our manufacturing process. Currently we laser cut acrylic, but if we were to develop 3D features, we would need some form of molding process. This would likely only be worth it if we produced large quantities with sophisticated tooling and machinery.
References
[1] Easier Living, “Grip-Tight Swivel Utensils,” Unknown. [Online]. Available: http://www.easierliving.com/grip-tight-swivel-utensils.html. [Accessed 18 February, 2017].
[2] The Writing Pen Store, “Ring Pen Ultra Ergonomic Grip,” Unknown. [Online]. Available: http://www.thewritingpenstore.com/p-3617-ring-pen-ultra-ergonomic-grip.aspx. [Accessed 18 February 2017].
[3] Culture Unplugged, “Moment by Moment: The Healing Journey of Molly Hale,” 2005. [Online]. Available: http://www.cultureunplugged.com/play/1319/Moment-by-Moment--The-Healing-Journey-of-Molly-Hale. [Accessed 23 January 2017].
[4] Jeramy Hale, “The Problem with Plugs,” 2017. [Online]. Available: https://www.youtube.com/watch?v=9o-dL7bUL-s. [Accessed 23 January 2017].
[5] Essential Aids UK, “Easypull Plug Aid,” Unknown. [Online]. Available: https://www.essentialaids.com/household/plug-pulls/easypull-plug-aid.html. [Accessed 23 January 2017].
[6] Essential Aids UK, “Plug Pull,” Unknown. [Online]. Available: https://www.essentialaids.com/household/plug-pulls/plug-pull.html. [Accessed 23 January 2017].
[7] Behance, “Design of an Ergonomic Plug,” 2015. [Online]. Available: https://www.behance.net/gallery/23266769/Design-of-an-Ergonomic-plug-FISHTAIL-PLUGS. [Accessed 24 January 2017].
[8] Yanko Design, “Another Adapter for the Blind,” 2014. [Online]. Available: http://www.yankodesign.com/2014/04/02/another-adapter-for-the-blind/. [Accessed 24 January 2017].
[9] Zip Tie Guy, "Zip Tie Tensile Strength," 2014. [Online]. Available: https://ziptieguy.wordpress.com/2012/01/27/zip-ties-and-tensile-strength/. [Accessed 20 February 2017].
[10] Dycem, “Dycem’s Product Range,” Unknown. [Online]. Available: https://www.dycem-ns.com/dycemshopus/. [Accessed 18 March 2017].