Giovanna Carmina Ibarra Bermúdez, Gustavo Shepard Nava, Katya Roxana, Corona Ruano, Homer Rodríguez Quiroz
Anahuac Mexico North University
1) Problem Statement/Research Question and Background
Our user, Dr. Marco is a high school teacher, he is a person who is blind from birth, and who also teaches children with cognitive disabilities. He uses the blackboard to teach, so his disability complicates its use in various ways, for example, when using a marker to write, he can lose the location of the text he is writing. He also uses the computer to present his classes, but he finds the same problem when he wants to make a drawing, he loses track of his progress.
A deep search was carried out in EASTIN (The Global Assistive Technology Information Network) to find out the existing solutions to the same or similar problems, the results shown did not satisfactorily meet Marco's needs, since only very basic templates were found to write on paper sheets, and the most sophisticated devices that allow drawings or writing to be saved on a computer had very large dimensions. It was then discovered that there was a gap in technical aids for the field of teaching associated with people with any type of vision impairment. That is how it was decided to look for a solution that would allow Marco to have a light device, simple to use and that would allow him to teach classes so that he can write and all his students can see the blackboard.
2) Methods/Approach/Solutions Considered
We found a device to draw on a computer, it is a tactile tablet that connects through a USB cable to the computer and can be used with multiple applications, the most useful that we determined was the use of the "Paint" program to make drawings. With this device, we intend to be able to manipulate the drawing that is being made in a more "tactile" or "physical" way. As the working area of the tablet is comfortably wide, we can use an additional device to help the tablet so that he can map in a mental way, guided by his fingers, the progress he is making in the drawing, helping him not to get lost in his drawing.
3) Description of Final Approach and Design
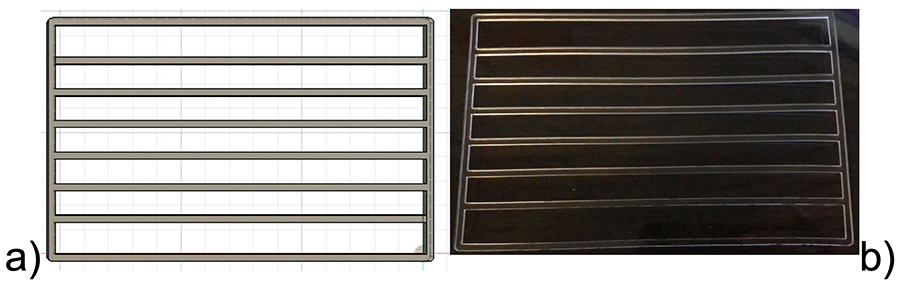
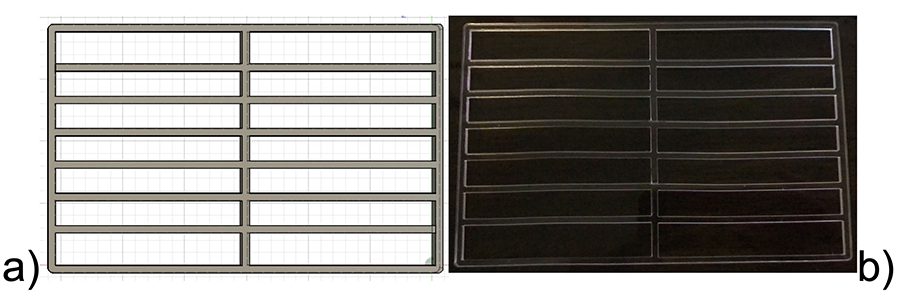
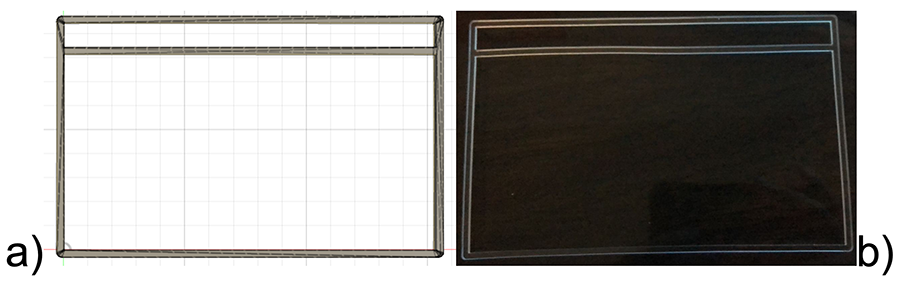
From the digitizing tablet, which is a device to write on the computer through a touch screen, and computer drawing programs, a device was proposed that would allow the user to create mental maps, synoptic tables, tables, and write guided by his fingers. In this way, a cover for the tablet was designed where only the space of the screen on which you can write would be free; with this solution, it is possible to delimit the space where the user can write, and that way it does not go out of the edges. On the other hand, to guide the user when writing, templates with different patterns were designed to create tables, synoptic tables, writings, and conceptual maps.
More specifically, 3D design software and device measurements were used to create the sleeve and templates. Once the components were designed, transparent acrylic and laser cutting were used to obtain the different parts that were placed and glued to obtain the final device.
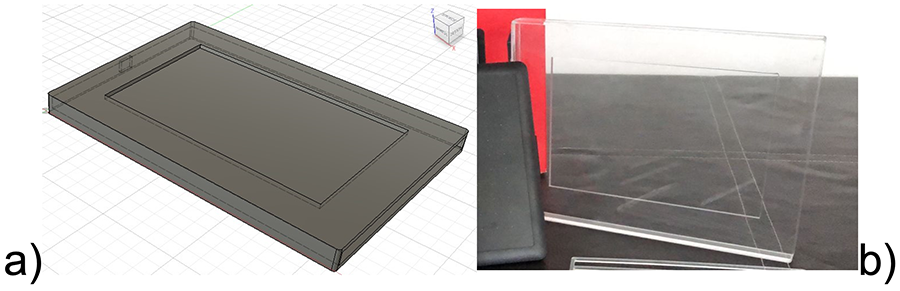
The design consists of two components, the first being a case for the device and the second being stencils to guide writing. The case or cover can be seen in figure 1, which leaves one side free for inserting the device, as well as the space to insert the charger and place the templates on the screen.
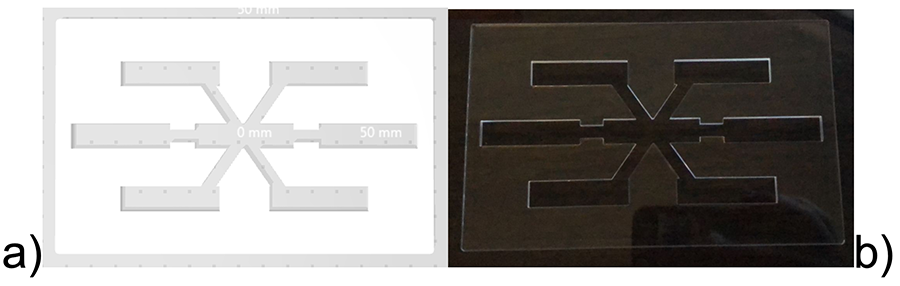
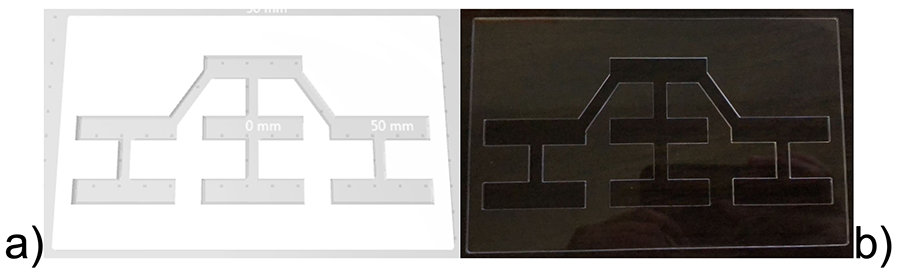
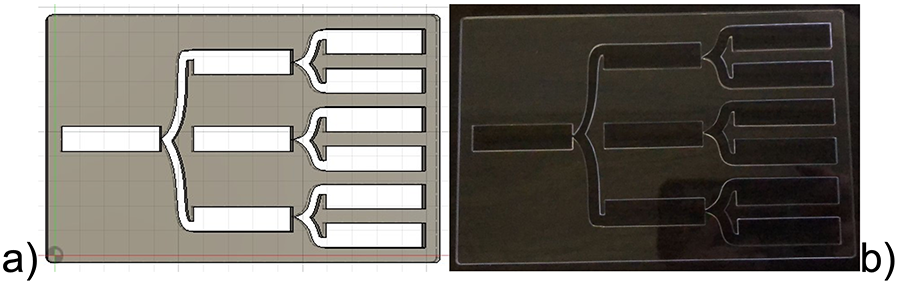
On the other hand, the templates that were made were the following: concept map (Fig. 2), downwards concept map (Fig. 3), synoptic table (Fig. 4), rows (Fig. 5), two-column table (Fig. 6), and title (Fig. 7).
4) Outcome (Results of any outcomes testing and/or user feedback)
As a general outcome we obtained a good restriction of movement with the templates fitted for the case, with the adequate width for the electronic pencil. The height of the rows were comfortable for the user and they displayed a fair size of writing on the screen. Our user in particular had some preferences in the templates we could share with him, but gave us some ideas for more templates like concept maps which we considered implementing for this project.
At first, templates' prototypes for the tablet made of cardboard were used, it allowed testing the device with Marco and making the necessary modifications to the design before having the final templates in acrylic. During this process, Marco tested above all the distance of the lines and the ease of use of the tablet, this also served to provide us with feedback mainly on the type of templates he needed to teach classes, with this new information new designs of the synoptic table, conceptual maps, tables, among others were made.
Once the final templates were obtained, Marco tested them again, this time we focused more on the ease of use of the device, since the designs were already approved by Marco. He told us that the only thing that was slightly difficult for him was to differentiate the 2 buttons of the pen from the tablet, however, he told us that it was a matter of practice and that he did not find it an impediment in the use of the tablet. He also told us that he found it easy to use, simple and intuitive, easy to connect, and light enough to carry in the briefcase in which he carries his computer to teach.
The user gave us another comment about locating himself on the tablet, and we are still working on ideas and implementing prototipes to solve this problem, but the general idea is a system of embossed markings on the outline of the case and on the templates so he can touch them and know where he's currently writing on the tablet and screen.
Lastly, he was concerned that the font would not be visible, but with the line sizes that were available, an excellent font size was obtained that, when projected in the classroom, can be readable even by those students sitting at the back of the classroom.
5) Cost (Cost to produce and expected pricing)
Case and templates: $574 mxn
Wacom tablet: $1,000 mxn
Total: $1,574 mxn = $79.61 usd
6) Significance
The purpose of this project is to provide visibly impaired teachers a simple, comfortable and efficient way of teaching; by using affordable materials to create a frame and templates for a tactile tablet.
Reference
EASTIN (2022). The Global Assistive Technology Information Network. Available at: http://www.eastin.eu/en/searches/products/index
Acknowledgment
We would like to give special thanks to Marco for his active participation in the development of the project, always showing a positive and cooperative attitude.